Skip to Main Content

Omeka Documentation: Add Items

Modules on the use of Omeka software, with FAQ for faculty and students.

Creating an Item

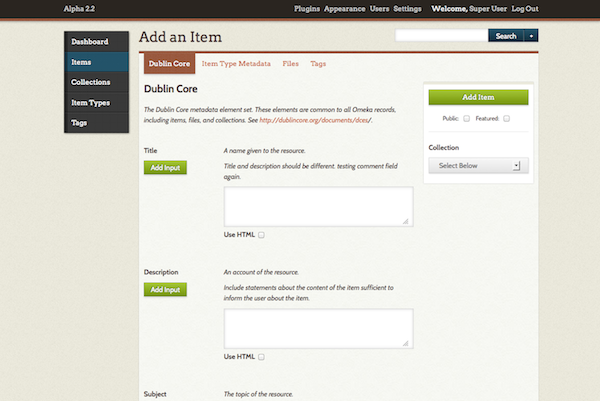
Before you begin adding items to Omeka, be sure to review with your instructor what information or metadata you should include and what item types your project will involve. For example, will it include still images, moving images, textual materials, or perhaps a mixture of all three? At minimum, you need to include a title, creator, and date.


Step by Step

Adding Items Step by Step

  1. From your items page, click the "Add an Item" button.
  2. This takes you to the admin/items/add page where you see a navigation bar across the top pointing you to different stages of adding an item. At any time, you may check the “Public and/or “Featured” boxes to the right of the item form. You may also change this status from the /admin/items page without needing to re-open the individual item.
  3. The first tab shows the Dublin Core metadata fields. These are available for every item in the archive. Each field can have multiple values; Simply click the "Add Input" button beside each field title to add a new input for that field.
  4. The Item Type Metadata tab lets you choose a specific item type for the object you are adding. Once you choose the type by using the drop-down menu, relevant metadata fields appear for you to complete. Be sure to choose Moving Image for films and movies.
  5. The Files tab lets you upload files to an item. Clicking the "Add Another File" link will reveal another field for adding a file. You can associate any number of files to an item. The first image file you upload will be the item’s thumbnail. If you have video files, please see our tutorial page on video in Omeka.
  6. The Tags tab allows you add keyword tags to your item.
  7. Assign items to a collection: To the right of the page, under the "Add Item" button is a drop-down menu where you can assign your item to a collection. Remember, items can only belong to one collection. If you don’t have a collection, you can assign the items later.
  8. Be sure to click the "Add Item" button to save your data.

Items Interface

Log into your dashboard at

http://www.whitmanarchives.org/yourclass/admin/

example: www.whitmanarchives.org/ENGL101/admin

Omeka Copyright

More information is available at http://www.omeka.org. Omeka is a project of the Roy Rosenzweig Center for History and New Media, George Mason University. Omeka and the Omeka logo are registered trademarks. Copyright © 2007–2014 CHNM.

© 2014 Whitman College Penrose Library |